Showing posts with label patchwork. Show all posts

Wednesday, 22 February 2012

Place mat tutorial

 The Valentine's Day place mats I mentioned last Wednesday are finally finished! I was not sure about the binding and in the end used the colour of the writing. The pink fabric is from Summersville available at Etsy


Finished! 
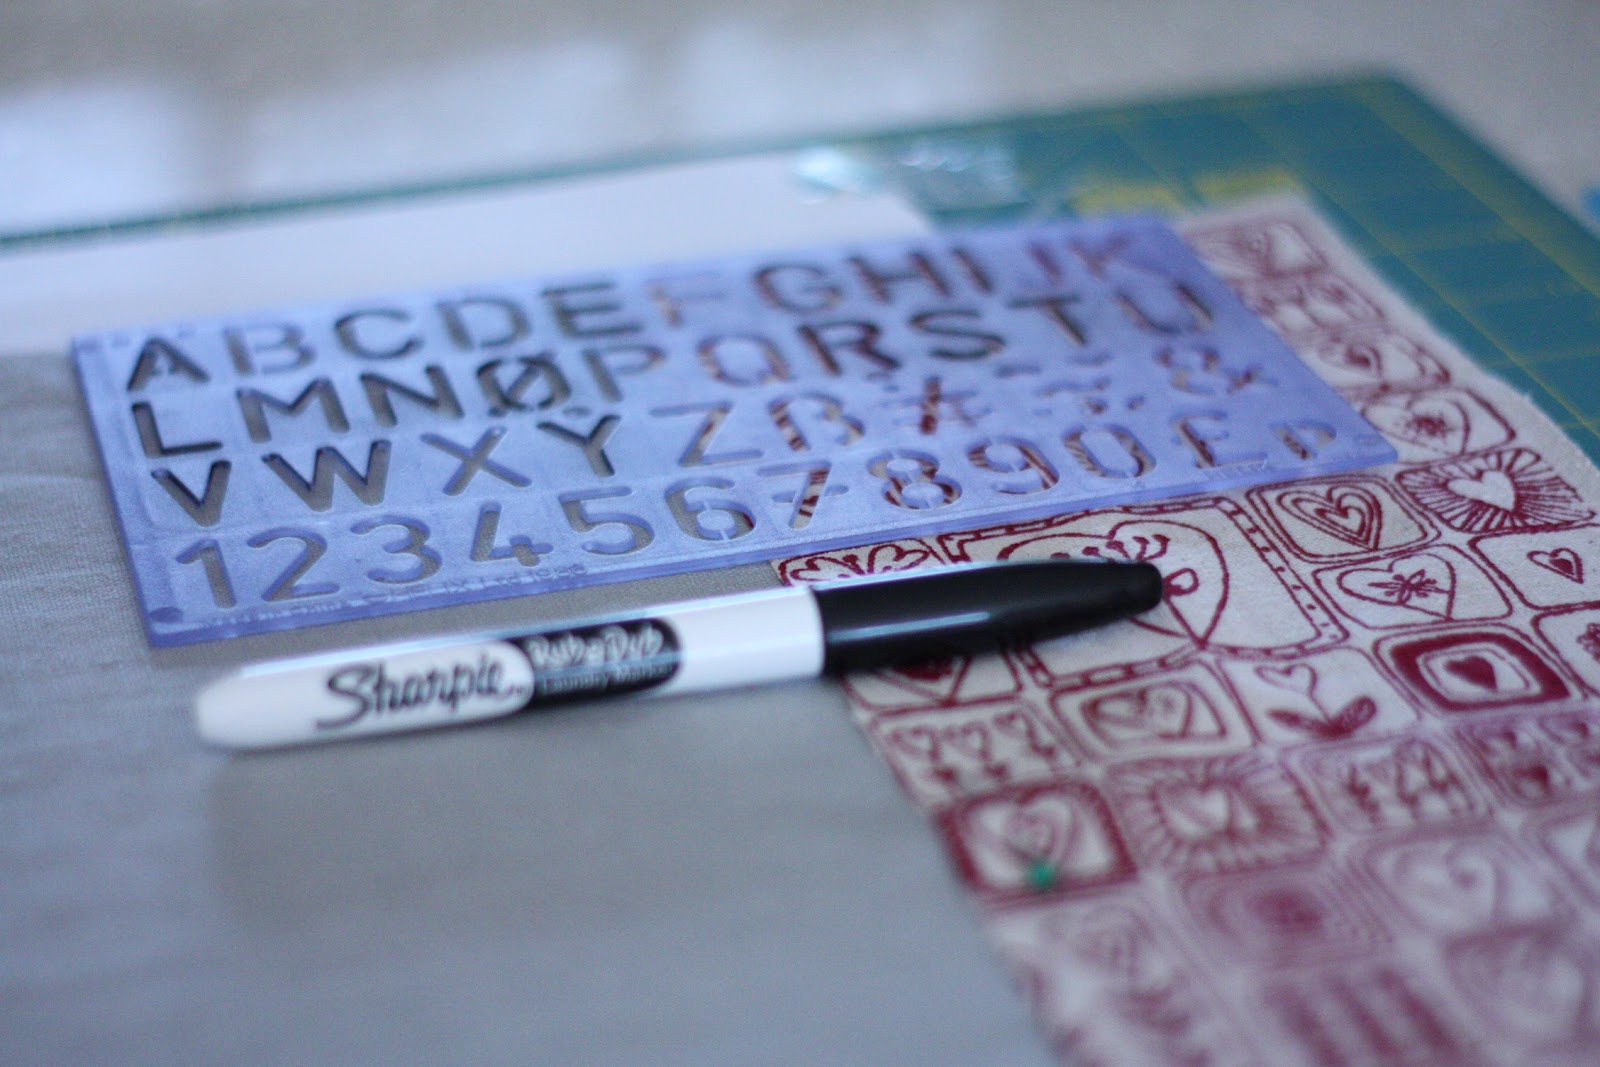
 So how did I write the quote on the linen fabric and followed the Wit and Whistle tutorial. Here is what you need: 

  • Linen fabric
  • Fabric Marker Pen (Sharpie pen)
  • Letter stencil


I would advise you to put pages underneath...


Here we are.. Simple really. Let me know if you are making one!


It is Wednesday... Just... SO I am linking up to WIP Wednesday at Freshly Pieced. Placemats are finished, yeah! I can move on to the next quilt - involving shirts and upcycling, more on this next week...


Wednesday, 15 February 2012

In progress and a real IT achievement (for me)! (Updated!)

It is Wednesday, and therefore it is W.I.P. Wednesday over at Freshly Pieced. 


What to report ... I made some progress with my two placemats for Valentine's Day (yes that would be for yesterday... or 14th Feb 2013 as the case may be now). Actually I saw it coming and I did not over do it on the hearts, so we may be able to use them before next year. 


The left hand side fabric is from Summersville on Etsy,
and right hand side one some linen fabric bought on Amazon


A tutorial to come on how I printed the quote on the linen fabric. Who can guess what it says? 


I can report NO progress on the shirt patchwork ... so there is no point to talk about it. 


I also need to make something out of these fabulous scraps I received from Indianna Dreams. As none of us really had some scraps, we decided to swap some fabric pieces. I was SO excited about it. She chose so well for me - look at all the grey and yellow. Need to put on my thinking cap now... 


Scraps
Winnowing is on its way, I am at that stage when I misjudged how much yarn I needed, and I am waiting, anxiously I may add, for that package. 


Winnowing waiting to be finished


FINALLY! I do have a button you can grab on the right-hand side bar... It took me AGES to get there... for something that is quite easy in the end... But everyone seems to have a different way to do it. (Sorry for those who came on this post before the updated version, it did not work, it should be fixed now and you can actually have your button...)


Anyway here are the steps I followed (a mix of different helpful blogger suggestions):


1. Choose your picture (I used my banner one... made sense right). I edited the picture with Picnik. 


2. I resized it to 125x 150 (should not be bigger than 150 to make sure it fits on other bloggers side bars)


3. Upload the picture to an online photo gallery service. I tried through Picasa, but my picture never appeared in the end (if someone managed to resolve that problem, please let me know). So I used Photobucket in the end - it is free and very fast. You get the HTML of your picture on the right hand-side.


4.Got to layout in blogger, to the design bar, and add an HTML gadget to the place you want your button to show. 


5. You can add a title ('Grab my button')


6. Copy the HTML Code you can find here


7. Paste the above HTML Code into the HTML gadget


8. Replace YOUR WEB ADDRESS by your blog address


9. Replace BLOG TITLE by a blog title of your choice (mine says Inspirations for Handmade)


10. Replace the IMAGE HTML ADDRESS by the HTML Code you found on Photobucket


11. Save it, test it and let me know how you got on! 

Monday, 13 February 2012

Giveaway Winner and some crafty randomness

I am back! I hope you enjoyed having the guest posts from Lucy at Charm about You, Popbabe7 and Emma. Thank you so much girls for keeping things running in my absence! 

Now what is it all about this randomness (I was not going to start by the winner, right!)? I finally had a chance to see the patchwork/cross-stitch plaid I made my parents two years ago. It is sitting on their couch in the Alps - totally in context obviously. 


So the cross-stitched cow trail (that you can sort of make out at the top left of the plaid) was the original purchase. I bought it with my Mum, oohhh 7 years ago (at least - the shop does not exist anymore), I finished it 2 years and a half ago.. and could have just framed it (It was hard enough to do to deserve it!). But no! Why do simple when you can over-complicate things? I decided that it would look very good on a plaid. It is OK, but the best piece is really that cross-stitch, let's face it... I may have over-complicated things.   


Apart from that I also found a picture of me - for those who want to know what I look like. This is totally representative of course.. as I was probably 2 in that picture (a family favourite, everyone has at least 2 in their houses). All I can say is thank you L'Oreal for bringing some natural blond highlights in my life, and thank you straighteners for getting rid of this locks I struggle with every morning. 


That dress my Mum and Mamy's favourite,
and they like it SO MUCH they keep buying more for
my non-existent children (yes they do and are open about it!)

Finally, the giveaway winner. You remember there was a lovely print from IOTA Illustration to win ... I decided not to go for random.org as I was concerned that the first or last entries would not get picked. M was slightly worried that the participants who did not win would track him down (I can give you his work address if you want...). Here is the innocent hand... 

M is getting in the spirit of Valentine's Day (balloons from Paperchase)

Anyway, unfortunately there could be only one winner, and that is


So Sarah at Almost Delightful, I will be in touch with you and this is all going to get to you very soon. 

I am hoping to run more giveaways as I loved running. I have a new target in mind.. So stay tune and follow me! 

Monday, 30 January 2012

{Artist Inspiration} - Tom Fruin and scraps

New York artist Tom Fruin used 1,000 reclaimed scraps of Plexiglas for his Kolonihavehus that takes its name and inspiration from Copenhagen’s ubiquitous kolonihavehus - a modest garden shed intended to provide state workers with refuge from the city’s cramped living conditions.


This really jumped at me - first of all for the use of geometrics - but also the colours and the fact that this is made of scraps. A lot of blogs are looking at how to use scraps ... although I still wonder how to define scraps (I suppose it depends how small or big your scrap project is, and how much patience one has).

For some patchwork inspiration do check Rachel's blog Stitched in Colour for the Scrap Attack project but check out also the Compost Quilt over at Completely Cauchy - one of my favourite quilts! (added later... I just realised there is a scrap attack Flickr Group for much more inspiration)

For some knitting inspiration, check out the scrappy lengthwise scarf by Zona Sherman. There are some beautiful versions of this project.

So what do you define as scrap, and what do you do with them?

Wednesday, 18 January 2012

New Toy - Part II

Pictures of the sleeve for my yarn winder are finally uploaded! I think M is soon going to be sick of grey and yellow - I hope you are not yet, because I am hoping to make one more grey and yellow 'thing' for our little room this weekend.


Let's start by the fact that I love this yellow fabric bought on Etsy at Stefanie's shop. I have a bit of a thing about geometrics as we know, and this is undoutedly my favourite fabric. I love how the top of the sleeve turned out. I was not sure how to end the sleeve as the yarn winder is cylindric. I decided an easy closing method - using strings. It makes it much easier to use.


As I mentioned on Monday I made a second cushion cover (well only the top part) which I really did not need (it stayed 6 months untouched - that was clearly a sign, right?). So I cut it (breathing in and out along the way) and rearranged to make a square pattern. The cushion cover was too small for the length of the yarn winder - hence the need for more fabric at the top and bottom.


I was also going to add my fav yellow fabric at the bottom - but hmmm well maybe it was too much. Added some Kona solid banana from
Simply Solids that I had left from the Cherry House QAL. Not a lot of quilting involved, a couple of lines at the bottom and at the top between the grey and yellow fabrics to reinforce the change.


So as we are Wednesday I have finally a chance to link up to
WIP Wednesday over at Freshly Pieced!


Off to Paris this afternoon, I am hoping to fit in a trip to La Droguerie (totally on the way back to the Eurostar - or not).. Will let you know how I got on Friday!

Monday, 16 January 2012

New toy

There was a plan, a very good plan. Yesterday I finished the sleeve for my new toy and I was going to post about it today - sorted. It meant that I was going to show you some patchwork and not some knitting - to break a bit the routine. It was a brilliant plan. Left my computer to upload the pictures on Picnik (whilst watching Sherlock - such a good episode yesterday!). And this morning I should have been able to edit the pics a bit. But this morning, surprise, none of the pictures of the sleeve were uploaded except one. Thanks to my trusted Blackberry, I can at least show you pictures of my new toy that needed a sleeve for the cold nights.


Isn't it beautiful? This is my Christmas or birthday present, as all of these things happen at the same time for me, from M - which I thought was amazing. I did mention I wanted a yarn winder, I showed him a couple on internet, explained the difference this would make to my life - yes, I laid it on thick. He clearly took all of these things on board and I got my very own this Christmas. Finished the hours spent in front of the TV making yarn balls.


Since receiving my present, I had had a chat with one of my colleagues at work about men and how they (supposedly according to her) buy you things they want for Christmas or birthdays. Let me reassure you, M has NO intention to knit, he looks at me weird when I knit. Not in a bad way, just more in a 'how does that work' way.

So for the sleeve... well this is the only picture rescued from last night upload. Quite a lot of details, right?! However I can tell you it is based on the same patchwork made for the cushion in the hobby room (as shown in Friday's post).. So I guess more to post tomorrow!


Happy Monday guys!

Tuesday, 29 November 2011

{PATCHWORK - Buy it or Make it?} Noas' Libellule obsession

You had nearly forgotten my {Buy it or Make it} feature, hadn't you? It has been on my mind for - like - ever, and I never actually managed to sit down and write any {BIMI} since August! That-is-not-good. But we are back on track - at least once a month. The patchwork theme may have looked an easy one to choose, 1) because Elle France (issue 18 Nov) had a feature on it (see 1 in collage), 2) because I stalk a lot of patchwork blogs on the net, and 3) because this is something I actually do. So I tried to make it a bit less 'cushions and throws' (my kind of patchwork) and a bit more fashion (sort of).


1. Elle France feature on patchwork; 2. Alphabet Patchwork Print by RukaRuka at Etsy; 3. Patchwork belt at Beltme.co.uk; 4. Sonia Rykiel Patchwork Dress at Asos; 5. Patchwork Apron at Anthropologie; 6. Esposito shoes at Farfetch; 7. Filkin Cushion at Toast; 8. Isabel Marant shirt at Matches.


(NB: pas d'accents aujourd'hui, clavier QWERTY) .. Voila ma selection patchwork. Comme je le disais en anglais ci-dessus le patchwork c'est mon truc, je fais meme part de mes projets sur mon blog! Donc j'aurai pu vous faire des listes de coussins et autres couvertures a acheter. Mais non, ici on veut du fashion et j'ai surtout eu de la chance que la Poule a petit pas nous ait sorti sa version de la chemise d'Isabel Marant il n'y a pas bien longtemps. Je ne vais pas vous re-ecrire les instructions de la Poule, c'est beaucoup plus marrant de lire ses billets.


{Make it} Well, you have the choice for patchwork. Check out my blogroll on the right-hand side and you will find what you need. But for the 'Homemade' version of the Isabel Marant shirt, you will have to check out one of my favourite French blogs La Poule a petit pas. She used a mix of two Japanese books patterns (you will see the pics on her blog). She mixed different fabrics and sewed all the pieces together before cutting out the patterns. Honestly this is WAY out of my league - but it looks SO much like the real thing I may have to try (or it may stay in my book of ideas for a while)...

Alternatively, as it is soon to be Christmas (you have noticed, haven't you?), I thought that you really needed was a Christmas stocking. Purlbee has a super detailed tutorial for THIS Christmas stocking (and if it came with yarn at my house, I will make more than one!). I reckon you can easily change the patchwork pattern and make it a bit more advanced - if you wanted to show off, for instance..


Pour mon deuxieme {made it} je prepare Noel. Alors avec mon Christmas Stocking selon le tuto de Purlbee, je serai prete a recevoir laines, tissus et autres fournitures pour mes futurs projets... Je veux meme bien en faire plusieurs si on a besoin de plus de place pour mes cadeaux - c'est pas un probleme! Je m'adapte!


So guys, are we ready for some patchwork? Are you inspired or has another patchwork project inspired you? Let me know in your comments, I love seeing your inspirations.

Wednesday, 10 August 2011

{Cool Britannia - Buy it or Make it?} Noas' Libellule obsession

Hello Hello Hello! How is everyone doing? Happy Wednesday, guys! I am pleased to report that things have calmed down a bit in London. Such a relief! So here is this week {Buy it or Make it?}.


Let me start by saying that to select only 9 items for this week's theme was really hard. There are great items out there that I would buy in addition to those I am presenting. I have also discarded items with too bright union jack colours - it is just not my style and big items such as the SMEG fridge, a leather chair from made.com, and a beautiful bedcover from Anthropologie.


1) Customisable Ipad Case, Zazzle.co.uk; 2) CrankCases iPhone case, Etsy; 3) Brit Lip Balm, Heal's; 4)ROBERTS Revival DAB Digital Radio, John Lewis; 5) Jan Constantine Cushion, John Lewis; 6) Recipe Book, Emma Bridgewater; 7) Rugby Shirt, Hackett; 8) Alexander McQueen Skull woven leather box clutch, Net-a-Porter; 9)Amet & Ladoue Union Jack Cotton Silk Square Scarf, John Lewis.


It is a beautiful selection, isn't it? But now you are asking yourself, how can I make it on my own? Can I really make it? Yes, you can - it will taking some baking, some knitting and some sewing skills (but not necessarily at the same time, actually I would not recommend it) ...


You want to impress your neighbours at your next street party, the BBC has the recipe for you! A Union Jack Battenburg! I could eat it right now and it is beautiful as well! Will have to try it - just to take the pictures.


You are on a diet... I hear you, your holdiay is coming up (lucky you!) - you just bought a bikini. I have the perfect solution. Swap baking for knitting, you will be so absorbed by it that you will not think about food again (well maybe not, but it may stop you going for the biscuit tin)! You can find the patterns for the scarf, cushion cover and dress for
free on the ROWAN website. I do love the scarf, and also the colour scheme they chose.


Last but not least, my favourite project.. Lily's Quilts' Double Fat Jack's Quilt Top. Lily shows you how to make this beautiful quilt top, step-by-step. Of course, once you know how to make it (with the little help of one very talented quilter), there is no stopping you making a cushion cover (did you remember that Jan Constantine one) - your colours, your material... It is up to you! Awesome!


So what do you think Guys? Are you lovin' the Cool Britannia theme? What will you be making or buying? Such a versatile theme!


PS: As always drop me an email if there is a theme you would like me to look at (it is probably on my list already), and also thanks to Lily to let me use her picture!


EDIT (29.11.2011) I have also done a {PATCHWORK - Buy it or Make it} if you are interested in the patchwork.

Friday, 22 July 2011

Noas' Libellule {Painting the bedroom}

Hiya guys, guess what? It is Friday, hooray! I got to wear my sunglasses - YESSS!


Today's post is about my bedroom (well ours if we want to be precise). Sarah over at Modern Country Style started a new link party about anything to do with paint (she has already hosted one about our kitchen favourites). And we worked so hard on the colour scheme of this bedroom that I thought it was time for me to show it to you.


It is not the biggest one in our house, but it has the garden view. And what is the point of commuting and having a house away from the City (rather than a flat in central London) if I cannot see the garden. So it was decided a long time ago that the smallest double bedroom would be our bedroom.


Here are a few pictures of the state it was in at several stages of the renovation process. Sometimes it is good to be reminded of how bad it was at some point. Our main task had been to be sampling the paint (we already had the bed)... And to be fair our first choice (if M is reading this, I would like to remind him that this was not my first choice) was Wickes-Nickel. We changed our mind after lunch at a local pub (not drinking induced but because of their colour scheme). And went for Wickes-Pewter - the darkest grey.


I was convinced that we should go for a grey-sand palette - the bright yellow came later. The colour palette was allowing us to have a clean finish that is neither too masculine or feminine - but still cosy and relaxing. Somewhere to read or have a chat. The fact that the room is smaller than the other cosiness.

So here is our bedroom, as from yesterday as M hung my Cherry QAL quilt last night - just for this post (super sweet).


I also added the cushion I finished a month or so ago. The two table lamps are the Verner Panton Flowerpot lamps (available in loads of colours). The bedding is from Sheridan. And we bought 4 square floating sheves from Homebase (took M ages to put those up).

What do you think guys? Loving the colour scheme? Or is it a bit too much for you? I won't get offended... Hope you are all having a great Friday and have wonderful plans for the weekend!

Thursday, 30 June 2011

Homemade { Patchwork - For my Wall}

You will remember the Cherry House QAL I started in February. I finally finished it. It still needs hanging but here is my version.


Material: Kona Medium Grey (1223), Kona Red (1308), Kona School Bus (1482), Kona Banana (1481) at Simply Solids,
plain white fabric I had, two different quilting threads (grey and yellow) at the Cotton Patch.


Not sure you can see the quilting (it should be more obvious when hung). The idea was to have concentric squares so it looks like a painting (or an excuse to indulge into my obsession for geometrics. Depends who/when you ask.)

I am actually really pleased with it, despite my few issues (alignment of the small squares not that straight, quilting issues). Well, at least it definitely looks homemade!

Monday, 25 October 2010

Knitting + Patchwork I Cushion in Green

I finished a couple of projects over the weekend, one in particular really needed to be finished. One of my friends spent the weekend with us and had commissioned a cushion cover for her new flat (brown sofas, and she wanted a green cushion). The below image set the colour tone she wanted...


In the end I chose the Mirasol Sulka yarn in Thyme (212), and I wanted a pattern/stitch that was both simple but quite effective visually. I tried a couple of stitches and ended with the herringbone stitch. This tutorial is really useful. Once you know it is easy but requires a lot of work for your elbows though. Beware this stitch eats yarn, but the effect is really worth it.


My big issue was to make the cushion reversible. Once I decided that there was too much yarn going into this I decided to go for a geometric pattern at the back. Here is the back (already quilted) on its own. It is my first attempt at this design, so it is not my best effort but you have a good idea of the effect.


And here is the corner of the cushion! it is actually not as bad as other parts of the patchwork. I love the butterflies fabric (I think it is a Michael Miller fabric). The colours are a bit richer than shown on the picture.


I will definitely used that pattern again, I am hoping to make a big wall hanging patchwork for the new house, with a mix of light and dark colours of the same tone.

Tuesday, 31 August 2010

Project on a smaller scale

Here in England, it was a long weekend and which meant having time for soft furnishing projects around the house, and trying new patterns. I have already talked about my crochet blanket. It is going to turn out great, but many hours will have gone into it.

I also need to change the cushion covers of our sofa. They are dark grey at the moment. The new colour scheme is going to be similar to that of the blanket. I think I found the pattern for the covers. It is called cathedral window and I stumbled across it on the A la Mode blog. How could I not fall in love with it? I did a little bit more research and the other bloggers who used the pattern really inspired me.

Heather from A la Mode tells you she has an 'easy peasy' tutorial.. I needed to check that for myself before choosing the fabric and making a serious commitment. I had some fabric left after my needle case, and decided to make a pin cushion.


Turned out well, didn't it? I love the diamond shape in the middle. I had more of the patterned fabric, but I may have worked better with the pattern in the diamond and the solid as background. Then again I do not like that yellow fabric really, it is a bit old-fashioned, but totally useful for these little projects. Not sure I would do such a big pin cushion in the end, or even for one of the diamond on my cushion cover.


M agreed as well, this is going to be the pattern for the covers, only need to find some nice fabric for it now.